Originally posted on Technet.
Technical Reviewers:
- Cecilia Cole, Program Manager
In our previous post, we demonstrated how to install the WSUS Role on the Windows Server “8” Beta using the new Server Manager. In this post you will learn how to perform the same task using PowerShell.
To install WSUS on Windows Server “8” Beta using PowerShell, follow the steps below:
Sign in on Windows Server “8” Beta
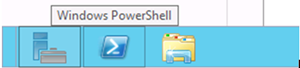
On the taskbar click Windows PowerShell button.
In the PowerShell Console type
Install-WindowsFeature -Name UpdateServices, UpdateServices-Uiand press ENTER.The installation process will start and a progress counter will appear on the screen. Wait until the installation reaches 100% and you receive a message that the installation succeeded before moving on to the next step.
Type
& 'C:\Program Files\Update Services\Tools\WsusUtil.exe' postinstall contentdir=C:\Mycontentand press ENTER.Wait until you receive the message that the post installation successfully finished.
Type Exit and press ENTER to leave the PowerShell interface.
At this point the WSUS installation is completed and you may launch the WSUS Console using the Tools menu. When you launch WSUS for the first time the WSUS Configuration Wizard will appear. For more information about how to configure WSUS, read Step 3: Configure WSUS in the Deploying Windows Server Updates Services in the Organization article at the TechNet Library.
If you want to perform the full installation and post installation tasks using PowerShell you should run this script once you finish the installation via PowerShell.
Stay tuned for more exciting stuff on this blog and the Windows Server Blog from the server leadership team.